2. Advanced Messaging Features, Push Notifications, Synchronization, and Multi-Device Sign-on
Introduction
In the previous chapter, Basic Conversations and Messages, we introduced how you can create components in your app that support one-on-one chats and group chats, as well as how you can handle events triggered by the cloud. In this chapter, we will show you how to implement advanced features like:
- Getting receipts when messages are delivered and read
- Mentioning people with "@"
- Recalling and editing messages
- Push notifications and message synchronization
- Single-device or multi-device sign-on
- Sending messages of your custom types
Advanced Messaging Features
If you are building an app for team collaboration or social networking, you may want more features to be included besides basic messaging. For example:
- To mention someone with "@" so that they can easily find out what messages are important to them.
- To edit or recall a message that has been sent out.
- To send status messages like "Someone is typing".
- To allow the sender of a message to know if it's delivered or read.
- To synchronize messages sent to a receiver that has been offline.
With Instant Messaging, you can easily implement the functions mentioned above.
Mentioning People
Some group chats have a lot of messages going on and people may easily overlook the information that's important to them. That's why we need a way for senders to get people's attention.
The most commonly used way to mention someone is to type "@ + name" when composing a message. But if we break it down, we'll notice that the "name" here is something determined by the app (it could be the real name or the nickname of the user) and could be totally different from the clientId identifying the user (since one is for people to see and one is for computers to read). A problem could be caused if someone changes their name at the moment another user sends a message with the old name mentioned. Besides this, we also need to consider the way to mention all the members in a conversation. Is it "@all"? "@group"? Or "@everyone"? Maybe all of them will be used, which totally depends on how the UI of the app is designed.
So we cannot mention people by simply adding "@ + name" into a message. To walk through that, two additional properties are given to each message (LCIMMessage):
mentionList, an array of strings containing the list ofclientIds being mentioned;mentionAll, aBoolindicating whether all the members are mentioned.
Depending on the logic of your app, it's possible for you to have both mentionAll to be set and mentionList to contain a list of members. Your app shall provide the UI that allows users to type in and select the members they want to mention. The only thing you need to do with the SDK is to call the setters of mentionList and mentionAll to set the members being mentioned. Here is a code example:
- Unity
- Android
- iOS
- JavaScript
LCIMTextMessage textMessage = new LCIMTextMessage("@Tom Come back early.") {
    MentionIdList = new string[] { "Tom" }
};
await conversation.Send(textMessage);
String content = "@Tom Come back early.";
LCIMTextMessage  message = new LCIMTextMessage();
message.setText(content);
List<String> list = new ArrayList<>(); // A list for holding the members being mentioned; you can add members into the list with the code below
list.add("Tom");
message.setMentionList(list);
imConversation.sendMessage(message, new LCIMConversationCallback() {
   @Override
   public void done(LCIMException e) {
   }
});
LCIMMessage *message = [LCIMTextMessage messageWithText:@"@Tom Come back early." attributes:nil];
message.mentionList = @[@"Tom"];
[conversation sendMessage:message callback:^(BOOL succeeded, NSError * _Nullable error) {
    /* A message mentioning Tom has been sent */
}];
const message = new TextMessage(`@Tom Come back early.`).setMentionList([
  "Tom",
]);
conversation
  .send(message)
  .then(function (message) {
    console.log("Sent!");
  })
  .catch(console.error);
You can also mention everyone by setting mentionAll:
- Unity
- Android
- iOS
- JavaScript
LCIMTextMessage textMessage = new LCIMTextMessage("@all") {
    MentionAll = true
};
await conv.Send(textMessage);
String content = "@all";
LCIMTextMessage  message = new LCIMTextMessage();
message.setText(content);

boolean mentionAll = true; // Indicates if everyone is mentioned
message.mentionAll(mentionAll);

imConversation.sendMessage(message, new LCIMConversationCallback() {
   @Override
   public void done(LCIMException e) {
   }
});
LCIMMessage *message = [LCIMTextMessage messageWithText:@"@all" attributes:nil];
message.mentionAll = YES;
[conversation sendMessage:message callback:^(BOOL succeeded, NSError * _Nullable error) {
    /* A message mentioning everyone has been sent */
}];
const message = new TextMessage(`@all`).mentionAll();
conversation
  .send(message)
  .then(function (message) {
    console.log("Sent!");
  })
  .catch(console.error);
The receiver of the message can call the getters of mentionList and mentionAll to see the members being mentioned:
- Unity
- Android
- iOS
- JavaScript
jerry.onMessage = (conv, msg) => {
    List<string> mentionIds = msg.MentionIdList;
};
@Override
public void onMessage(LCIMAudioMessage msg, LCIMConversation conv, LCIMClient client) {
  // Get a list of clientIds being mentioned
  List<String> currentMsgMentionUserList = message.getMentionList();
}
// The code below shows how you can get a list of clientIds being mentioned in an LCIMTypedMessage; the code can be modified to serve other types inherited from LCIMMessage
- (void)conversation:(LCIMConversation *)conversation didReceiveTypedMessage:(LCIMTypedMessage *)message {
    // Get a list of clientIds being mentioned
    NSArray *mentionList = message.mentionList;
}
client.on(Event.MESSAGE, function messageEventHandler(message, conversation) {
  var mentionList = receivedMessage.getMentionList();
});
To make it easier to display things on the UI, the following two flags are offered by LCIMMessage to indicate the status of mentioning:
mentionedAll: Whether all the members in the conversation are mentioned. Becomestrueonly whenmentionAllis true, otherwise it remainsfalse.mentioned: Whether the current user is mentioned. BecomestruewhenmentionListcontains theclientIdof the current user or whenmentionAllistrue, otherwise it remainsfalse.
Here is a code example:
- Unity
- Android
- iOS
- JavaScript
client.OnMessage = (conv, msg) => {
    bool mentioned = msg.MentionAll || msg.MentionList.Contains("Tom");
};
@Override
public void onMessage(LCIMAudioMessage msg, LCIMConversation conv, LCIMClient client) {
  // Check if all the members in the conversation are mentioned
  boolean currentMsgMentionAllUsers = message.isMentionAll();
  // Check if the current user is mentioned
  boolean currentMsgMentionedMe = message.mentioned();
}
// The code below shows how you can check if all the members in the conversation or the current user is mentioned in an LCIMTypedMessage; the code can be modified to serve other types inherited from LCIMMessage
- (void)conversation:(LCIMConversation *)conversation didReceiveTypedMessage:(LCIMTypedMessage *)message {
    // Check if all the members in the conversation are mentioned
    BOOL mentionAll = message.mentionAll;
    // Check if the current user is mentioned
    BOOL mentionedMe = message.mentioned;
}
client.on(Event.MESSAGE, function messageEventHandler(message, conversation) {
  var mentionedAll = receivedMessage.mentionedAll;
  var mentionedMe = receivedMessage.mentioned;
});
Modify a Message
To allow users to edit the messages they sent, you need to enable Allow editing messages with SDK on Developer Center > Your game > Game Services > Cloud Services > Instant Messaging > Settings > Instant Messaging settings. There are no limits on the time within which users can perform this operation. However, users are only allowed to edit the messages they sent, not the ones others sent.
To modify a message, what you would do is not update the original message instance, but create a new one and call Conversation#updateMessage(oldMessage, newMessage) to submit the request to the cloud. Here is a code example:
- Unity
- Android
- iOS
- JavaScript
LCIMTextMessage newMessage = new LCIMTextMessage("The new message.");
await conversation.UpdateMessage(oldMessage, newMessage);
LCIMTextMessage textMessage = new LCIMTextMessage();
textMessage.setContent("The new message.");
imConversation.updateMessage(oldMessage, textMessage, new LCIMMessageUpdatedCallback() {
  @Override
  public void done(LCIMMessage avimMessage, LCException e) {
    if (null == e) {
      // The message is updated; avimMessage is the updated message
    }
  }
});
LCIMMessage *oldMessage = <#MessageYouWantToUpdate#>;
LCIMMessage *newMessage = [LCIMTextMessage messageWithText:@"Just a new message" attributes:nil];

[conversation updateMessage:oldMessage
              toNewMessage:newMessage
                  callback:^(BOOL succeeded, NSError * _Nullable error) {
                      if (succeeded) {
                          NSLog(@"The message is updated.");
                      }
}];
var newMessage = new TextMessage("new message");
conversation
  .update(oldMessage, newMessage)
  .then(function () {
    // The message is updated
  })
  .catch(function (error) {
    // Handle error
  });
If the modification succeeded, other members in the conversation will receive a MESSAGE_UPDATE event:
- Unity
- Android
- iOS
- JavaScript
tom.OnMessageUpdated = (conv, msg) => {
    if (msg is LCIMTextMessage textMessage) {
        WriteLine($"Content: {textMessage.Text}; Message ID: {textMessage.Id}");
    }
};
void onMessageUpdated(LCIMClient client, LCIMConversation conversation, LCIMMessage message) {
  // message is the updated message
}
/* A delegate method for handling events of editing messages */
- (void)conversation:(LCIMConversation *)conversation messageHasBeenUpdated:(LCIMMessage *)message reason:(LCIMMessagePatchedReason * _Nullable)reason {
    /* A message is updated */
}
var { Event } = require("leancloud-realtime");
conversation.on(Event.MESSAGE_UPDATE, function (newMessage, reason) {
  // newMessage is the updated message
  // Look for the original message with its ID and replace it with newMessage
  // reason (optional) is the reason the message is edited
  // If reason is not specified, it means the sender edited the message
  // If the code of reason is positive, it means a hook on Cloud Engine caused the edit
  // (the code value can be specified when defining hooks)
  // If the code of reason is negative, it means a built-in mechanism of the system caused the edit
  // For example, -4408 means the message is edited due to text moderation
  // The detail of reason is a string containing the explanation
});
For Android and iOS SDKs, if caching is enabled (it is enabled by default), the SDKs will first update the modified message in the cache and then trigger an event to the app. When you receive such an event, simply refresh the chatting page to reflect the latest collection of messages.
If a message is modified by the system (for example, due to text moderation or by a hook on Cloud Engine), the sender will receive a MESSAGE_UPDATE event, and other members in the conversation will receive the modified message.
Recall a Message
Besides modifying a sent message, a user can also recall a message they sent. Similarly, you need to enable Allow recalling messages with SDK on Developer Center > Your game > Game Services > Cloud Services > Instant Messaging > Settings > Instant Messaging settings. Also, there are no limits on the time within which users can perform this operation, and users are only allowed to recall the messages they sent, not the ones others sent.
To recall a message, invoke the Conversation#recallMessage method:
- Unity
- Android
- iOS
- JavaScript
await conversation.RecallMessage(message);
conversation.recallMessage(message, new LCIMMessageRecalledCallback() {
    @Override
    public void done(LCIMRecalledMessage recalledMessage, LCException e) {
        if (null == e) {
            // The message is recalled; the UI may be updated now
        }
    }
});
LCIMMessage *oldMessage = <#MessageYouWantToRecall#>;

[conversation recallMessage:oldMessage callback:^(BOOL succeeded, NSError * _Nullable error, LCIMRecalledMessage * _Nullable recalledMessage) {
    if (succeeded) {
        NSLog(@"The message is recalled.");
    }
}];
conversation
  .recall(oldMessage)
  .then(function (recalledMessage) {
    // The message is recalled
    // recalledMessage is a RecalledMessage
  })
  .catch(function (error) {
    // Handle error
  });
Once a message is recalled, other members in the conversation will receive the MESSAGE_RECALL event:
- Unity
- Android
- iOS
- JavaScript
tom.OnMessageRecalled = (conv, recalledMsg) => {
    // recalledMsg is the message being recalled
};
void onMessageRecalled(LCIMClient client, LCIMConversation conversation, LCIMMessage message) {
  // message is the message being recalled
}
/* A delegate method for handling events of recalling messages */
- (void)conversation:(LCIMConversation *)conversation messageHasBeenRecalled:(LCIMRecalledMessage *)message reason:(LCIMMessagePatchedReason * _Nullable)reason {
    /* A message is recalled */
}
var { Event } = require("leancloud-realtime");
conversation.on(Event.MESSAGE_RECALL, function (recalledMessage, reason) {
  // recalledMessage is the message being recalled
  // Look for the original message with its ID and replace it with recalledMessage
  // reason (optional) is the reason the message is recalled; see the part for editing messages for more details
});
For Android and iOS SDKs, if caching is enabled (it is enabled by default), the SDKs will first delete the recalled message from the cache and then trigger an event to the app. This ensures the consistency of data internally. When you receive such an event, simply refresh the chatting page to reflect the latest collection of messages. Depending on your implementation, either the recalled message will simply disappear, or an indicator saying the message has been recalled will take the original message's place.
Transient Messages
Sometimes we need to send status updates like "Someone is typing…" or "Someone changed the group name to XX". Different from messages sent by users, these messages don't need to be stored in the history, nor do they need to be guaranteed to be delivered (if members are offline or there is a network error, it would be okay if these messages are not delivered). Such messages are best sent as transient messages.
Transient message is a special type of message. It has the following differences compared to a basic message:
- It won't be stored in the cloud so it couldn't be retrieved from history messages.
- It's only delivered to those who are online. Offline members cannot receive it later or get push notifications about it.
- It's not guaranteed to be delivered. If there's a network error preventing the message from being delivered, the server won't make a second attempt.
Therefore, transient messages are best for communicating real-time updates of statuses that are changing frequently or implementing simple control protocols.
The way to construct a transient message is the same as that for a basic message. The only difference is the way it is being sent. So far we have shown the following way of sending messages with LCIMConversation:
- Unity
- Android
- iOS
- JavaScript
public async Task<LCIMMessage> Send(LCIMMessage message, LCIMMessageSendOptions options = null);
/**
 * Send a message
 */
public void sendMessage(LCIMMessage message, final LCIMConversationCallback callback)
/*!
 Send a message
 */
- (void)sendMessage:(LCIMMessage *)message
           callback:(void (^)(BOOL succeeded, NSError * _Nullable error))callback;
/**
 * Send a message
 * @param  {Message} message The message itself; an instance of Message or its subtype
 * @return {Promise.<Message>} The message being sent
 */
async send(message)
In fact, an additional parameter LCIMMessageOption can be provided when sending a message. Here is a complete list of interfaces offered by LCIMConversation:
- Unity
- Android
- iOS
- JavaScript
/// <summary>
/// Sends a message in this conversation.
/// </summary>
/// <param name="message">The message to send.</param>
/// <returns></returns>
public async Task<LCIMMessage> Send(LCIMMessage message, LCIMMessageSendOptions options = null);
/**
 * Send a message
 * @param message
 * @param messageOption
 * @param callback
 */
public void sendMessage(final LCIMMessage message, final LCIMMessageOption messageOption, final LCIMConversationCallback callback);
/*!
 Send a message
 @param message - The message itself
 @param option - Options
 @param callback - Callback
 */
- (void)sendMessage:(LCIMMessage *)message
             option:(nullable LCIMMessageOption *)option
           callback:(void (^)(BOOL succeeded, NSError * _Nullable error))callback;
/**
 * Send a message
 * @param  {Message} message The message itself; an instance of Message or its subtype
 * @param {Object} [options] since v3.3.0; Options
 * @param {Boolean} [options.transient] since v3.3.1; Whether it is a transient message
 * @param {Boolean} [options.receipt] Whether receipts are needed
 * @param {Boolean} [options.will] since v3.4.0; Whether it is a will message
 * A will message will be sent when the user loses connection
 * @param {MessagePriority} [options.priority] The priority of the message; for chat rooms only
 * see: {@link module:leancloud-realtime.MessagePriority MessagePriority}
 * @param {Object} [options.pushData] The content for push notification; if the receiver is offline, a push notification with this content will be triggered
 * @return {Promise.<Message>} The message being sent
 */
async send(message, options)
With LCIMMessageOption, we can specify:
- Whether it is a transient message (field
transient). - Whether receipts are needed (field
receipt; more details will be covered later). - The priority of the message (field
priority; more details will be covered later). - Whether it is a will message (field
will; more details will be covered later). - The content for push notification (field
pushData; more details will be covered later); if the receiver is offline, a push notification with this content will be triggered.
The code below sends a transient message saying "Tom is typing…" to the conversation when Tom's input box gets focused:
- Unity
- Android
- iOS
- JavaScript
LCIMTextMessage textMessage = new LCIMTextMessage("Tom is typing…");
LCIMMessageSendOptions option = new LCIMMessageSendOptions() {
    Transient = true
};
await conversation.Send(textMessage, option);
String content = "Tom is typing…";
LCIMTextMessage  message = new LCIMTextMessage();
message.setText(content);

LCIMMessageOption option = new LCIMMessageOption();
option.setTransient(true);

imConversation.sendMessage(message, option, new LCIMConversationCallback() {
   @Override
   public void done(LCIMException e) {
   }
});
LCIMMessage *message = [LCIMTextMessage messageWithText:@"Tom is typing…" attributes:nil];
LCIMMessageOption *option = [[LCIMMessageOption alloc] init];
option.transient = true;
[conversation sendMessage:message option:option callback:^(BOOL succeeded, NSError * _Nullable error) {
    /* A transient message is sent */
}];
const message = new TextMessage("Tom is typing…");
conversation.send(message, { transient: true });
The procedure for receiving transient messages is the same as that for basic messages. You can run different logic based on the types of messages. The example above sets the type of the message to be text message, but it would be better if you assign a distinct type to it. Our SDK doesn't offer a type for transient messages, so you may build your own depending on what you need. See Custom Message Types for more details.
Receipts
When the cloud is delivering messages, it follows the sequence the messages are pushed to the cloud and delivers the former messages before the latter ones (FIFO). Our internal protocol also requires that the SDK sends an acknowledgment (ack) back to the cloud for every single message received by it. If a message is received by the SDK but the ack is not received by the cloud due to a packet loss, the cloud would assume that the message is not successfully delivered and will keep redelivering it until an ack is received. Correspondingly, the SDK also does its work to make duplicate messages insensible by the app. The entire mechanism ensures that no messages will be lost in the entire delivery process.
However, in certain scenarios, functionality beyond the one mentioned above is demanded. For example, a sender may want to know when the receiver got the message and when they opened the message. In a product for team collaboration or private communication, a sender may even want to monitor the real-time status of every message sent out by them. Such requirements can be satisfied with the help of receipts.
Similar to the way of sending transient messages, if you want receipts to be given back, you need to specify an option in LCIMMessageOption:
- Unity
- Android
- iOS
- JavaScript
LCIMTextMessage textMessage = new LCIMTextMessage("A very important message.");
LCIMMessageSendOptions option = new LCIMMessageSendOptions {
    Receipt = true
};
await conversation.Send(textMessage, option);
LCIMMessageOption messageOption = new LCIMMessageOption();
messageOption.setReceipt(true);
imConversation.sendMessage(message, messageOption, new LCIMConversationCallback() {
   @Override
   public void done(LCIMException e) {
   }
});
LCIMMessageOption *option = [[LCIMMessageOption alloc] init];
option.receipt = true;
[conversation sendMessage:message option:option callback:^(BOOL succeeded, NSError *error) {
    if (succeeded) {
        NSLog(@"Message sent with receipts requested.");
    }
}];
var message = new TextMessage("A very important message.");
conversation.send(message, {
  receipt: true,
});
Note:
Receipts are not enabled by default. You need to manually turn that on when sending each message. Receipts are only available for conversations with no more than 2 members.
So how do senders handle the receipts they get?
Delivery Receipts
When a message is delivered to the receiver, the cloud will give a delivery receipt to the sender. Keep in mind that this is not the same as a read receipt.
- Unity
- Android
- iOS
- JavaScript
// Tom creates an LCIMClient with his name as clientId
LCIMClient client = new LCIMClient("Tom");
// Tom logs in
await client.Open();

// Enable delivery receipt
client.OnMessageDelivered = (conv, msgId) => {
  // Things to do after messages are delivered
};
// Send message
LCIMTextMessage textMessage = new LCIMTextMessage("Wanna go to the bakery tonight?");
await conversation.Send(textMessage);
public class CustomConversationEventHandler extends LCIMConversationEventHandler {
  /**
   * Handle notifications for messages being delivered
   */
  public void onLastDeliveredAtUpdated(LCIMClient client, LCIMConversation conversation) {
    ;
  }
}

// Set up global event handler
LCIMMessageManager.setConversationEventHandler(new CustomConversationEventHandler());
// Implement `conversation:messageDelivered` to listen if there are messages delivered
- (void)conversation:(LCIMConversation *)conversation messageDelivered:(LCIMMessage *)message {
    NSLog(@"%@", @"Message delivered."); // Print log
}
var { Event } = require("leancloud-realtime");
conversation.on(Event.LAST_DELIVERED_AT_UPDATE, function () {
  console.log(conversation.lastDeliveredAt);
  // Update the UI to mark all the messages before lastDeliveredAt to be "delivered"
});
The content included in the receipt will not be a specific message. Instead, it will be the time the messages in the current conversation are last delivered (lastDeliveredAt). We have mentioned earlier that messages are delivered according to the sequence they are pushed to the cloud. Therefore, given the time of the last delivery, we can infer that all the messages sent before it are delivered. On the UI of the app, you can mark all the messages sent before lastDeliveredAt to be "delivered".
Read Receipts
When we say a message is delivered, what we mean is that the message is received by the client from the cloud. At this time, the actual user might not have the conversation page or even the app open (Android apps can receive messages in the background). So we cannot assume that a message is read just because it is delivered.
Therefore, we offer another kind of receipt showing if a receiver has actually seen a message.
Again, since messages are delivered in time order, we don't have to check if every single message is being read. Think about a scenario like this:
When a user opens a conversation, we can say that the user has read all the messages in it. You can use the following interface of Conversation to mark all the messages in it as read:
- Unity
- Android
- iOS
- JavaScript
/// <summary>
/// Mark the last message of this conversation as read.
/// </summary>
/// <returns></returns>
public Task Read();
/**
 * Mark as read
 */
public void read();
/*!
 Mark as read
 This method marks the latest message sent into a conversation by the other member as read. The sender of the message will get a read receipt.
 */
- (void)readInBackground;
/**
 * Mark as read
 * @return {Promise.<this>} self
 */
async read();
After the receiver has read the latest messages, the sender will get a receipt indicating that the messages they have sent out are read.
So if Tom is chatting with Jerry and wants to know if Jerry has read the messages, the following procedure would apply:
Tom sends a message to Jerry and requests receipts on it:
- Unity
- Android
- iOS
- JavaScript
LCIMTextMessage textMessage = new LCIMTextMessage("A very important message.");
LCIMMessageSendOptions options = new LCIMMessageSendOptions {
    Receipt = true
};
await conversation.Send(textMessage);
LCIMClient tom = LCIMClient.getInstance("Tom");
LCIMConversation conv = client.getConversation("551260efe4b01608686c3e0f");
LCIMTextMessage textMessage = new LCIMTextMessage();
textMessage.setText("Hello, Jerry!");
LCIMMessageOption option = new LCIMMessageOption();
option.setReceipt(true); /* Request receipts */
conv.sendMessage(textMessage, option, new LCIMConversationCallback() {
@Override
public void done(LCIMException e) {
if (e == null) {
/* Sent */
}
}
});LCIMMessageOption *option = [[LCIMMessageOption alloc] init];
option.receipt = YES; /* Request receipts */
LCIMTextMessage *message = [LCIMTextMessage messageWithText:@"Hello, Jerry!" attributes:nil];
[conversation sendMessage:message option:option callback:^(BOOL succeeded, NSError * _Nullable error) {
if (!error) {
/* Sent */
}
}];var message = new TextMessage("A very important message.");
conversation.send(message, {
receipt: true,
});Jerry reads Tom's message and calls
readon the conversation to mark the latest messages as read:- Unity
- Android
- iOS
- JavaScript
await conversation.Read();conversation.read();[conversation readInBackground];conversation
.read()
.then(function (conversation) {})
.catch(console.error.bind(console));Tom gets a read receipt with the conversation's
lastReadAtupdated. The UI can be updated to mark all messages sent beforelastReadAtto be read:- Unity
- Android
- iOS
- JavaScript
tom.OnLastReadAtUpdated = (conv) => {
    // The message is read by Jerry; the time Jerry read messages for the last time can be retrieved by calling conversation.LastReadAt
};
public class CustomConversationEventHandler extends LCIMConversationEventHandler {
/**
* Handle notifications for messages being read
*/
public void onLastReadAtUpdated(LCIMClient client, LCIMConversation conversation) {
/* The message is read by Jerry; the time Jerry read messages for the last time can be retrieved by calling conversation.getLastReadAt() */
}
}
// Set up the global event handler
LCIMMessageManager.setConversationEventHandler(new CustomConversationEventHandler());// Tom can get the update of lastReadAt within the delegate method of client
- (void)conversation:(LCIMConversation *)conversation didUpdateForKey:(LCIMConversationUpdatedKey)key {
if ([key isEqualToString:LCIMConversationUpdatedKeyLastReadAt]) {
NSDate *lastReadAt = conversation.lastReadAt;
/* The message is read by Jerry; lastReadAt can be used to update UI; for example, to mark all the messages before lastReadAt to be "read" */
}
}var { Event } = require("leancloud-realtime");
conversation.on(Event.LAST_READ_AT_UPDATE, function () {
console.log(conversation.lastReadAt);
// Update the UI to mark all the messages before lastReadAt to be "read"
});
Note:
To use read receipts, turn on notifications on updates of unread message count when initializing your app.
Muting Conversations
If a user doesn't want to receive notifications from a conversation but still wants to stay in it, they can mute the conversation. See Muting Conversations in the next chapter for more details.
Will Messages
Will message can be used to automatically notify other members in a conversation when a user goes offline unexpectedly. It gets its name from the wills filed by testators, giving people a feeling that the last messages of a person should always be heard. It looks like the message saying "Tom is offline and cannot receive messages" in this image:
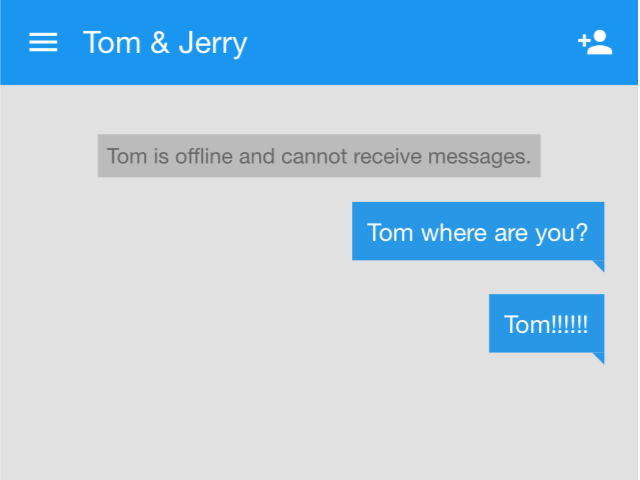
A will message needs to be composed ahead of time and cached on the cloud. The cloud doesn't send it out immediately after receiving it. Instead, it waits until the sender of it goes offline unexpectedly. You can implement your own logic to handle such an event.
- Unity
- Android
- iOS
- JavaScript
LCIMTextMessage message = new LCIMTextMessage("I am a will message. I will be sent out to other members in the conversation when the sender goes offline unexpectedly.");
LCIMMessageSendOptions options = new LCIMMessageSendOptions {
    Will = true
};
await conversation.Send(message, options);
LCIMTextMessage message = new LCIMTextMessage();
message.setText("I am a will message. I will be sent out to other members in the conversation when the sender goes offline unexpectedly.");

LCIMMessageOption option = new LCIMMessageOption();
option.setWill(true);

conversation.sendMessage(message, option, new LCIMConversationCallback() {
  @Override
  public void done(LCIMException e) {
    if (e == null) {
      // Sent
    }
  }
});
LCIMMessageOption *option = [[LCIMMessageOption alloc] init];
option.will = YES;

LCIMMessage *willMessage = [LCIMTextMessage messageWithText:@"I am a will message. I will be sent out to other members in the conversation when the sender goes offline unexpectedly." attributes:nil];

[conversation sendMessage:willMessage option:option callback:^(BOOL succeeded, NSError * _Nullable error) {
    if (succeeded) {
        NSLog(@"Sent!");
    }
}];
var message = new TextMessage(
  "I am a will message. I will be sent out to other members in the conversation when the sender goes offline unexpectedly."
);
conversation
  .send(message, { will: true })
  .then(function () {
    // Sent; other members will see the message once the current client goes offline unexpectedly
  })
  .catch(function (error) {
    // Handle error
  });
Once the sender goes offline unexpectedly, other members will immediately receive the will message. You can design your own way to display it on the UI.
Will message has the following restrictions:
- Each user can only have one will message set up at a time. This means that if a user sets will messages for multiple conversations or multiple will messages for the same conversation, only the last one will take effect.
- Will messages don't get stored in the history.
- If a user logs out proactively, the will message set by this user will not be sent out (if there is one).
Text Moderation
If your app allows users to create group chats, you might consider filtering cuss words from the messages sent by users. Instant Messaging offers a built-in component that helps you easily implement this function. See Text Moderation in the next chapter for more details.
Handling Undelivered Messages
Sometimes you may need to store the messages that are not successfully sent out into a local cache and handle them later. For example, if a client's connection to the server is lost and a message cannot be sent out due to this, you may still keep the message locally. Perhaps you can add an error icon and a button for retrying next to the message displayed on the UI. The user may tap on the button when the connection is recovered to make another attempt to send the message.
By default, both Android and iOS SDKs enable a local cache for storing messages. The cache stores all the messages that are already sent to the cloud and keeps itself updated with the data in the cloud. To make things easier, undelivered messages can also be stored in the same cache.
The code below adds a message to the cache:
- Unity
- Android
- iOS
- JavaScript
// Not supported yet
conversation.addToLocalCache(message);
[conversation addMessageToCache:message];
// Not supported yet
The code below removes a message from the cache:
- Unity
- Android
- iOS
- JavaScript
// Not supported yet
conversation.removeFromLocalCache(message);
[conversation removeMessageFromCache:message];
// Not supported yet
When reading messages from the cache, you can make messages look different on the UI based on the property message.status. If the status of a message is LCIMMessageStatusFailed, it means the message cannot be sent out, so you can add a button for retrying on the UI. An additional benefit of using the local cache is that the SDK will make sure the same message only gets sent out once. This ensures that there won't be any duplicate messages on the cloud.
Push Notifications
If your users are using your app on mobile devices, they might close the app at any time, which prevents you from delivering new messages to them in the ordinary way. At this time, using push notifications becomes a good alternative to get users notified when new messages are coming in.
If you are building an iOS or Android app, you can utilize the built-in push notification services offered by these operating systems, as long as you have your certificates configured for iOS or have the function enabled for Android. Check the following pages for more details:
The cloud will associate the clientIds of users with the data in the _Installation table that keeps track of the devices. When a user sends a message to a conversation, the cloud will automatically convert the message to a push notification and send it to those who are offline but are using iOS devices or using Android devices with push notification services enabled. We also allow you to connect third-party push notification services to your app.
The highlight of this feature is that you can customize the contents of push notifications. You have the following three ways to specify the contents:
Setting up a static message
You can fill in a global static JSON string on Developer Center > Your game > Game Services > Cloud Services > Instant Messaging > Settings > Push notifications for delivering push notifications with a static message. For example, if you put:
{ "alert": "New message received", "badge": "Increment" }Then whenever there is a new message going to an offline user, the user will receive a push notification saying "New message received".
Keep in mind that
badgeis for iOS devices only which means to increase the number displayed on the badge of the app. Its value,Increment, is case-sensitive. Typically, when an end user opens or closes the application, you need to set the value of the badge field of the_Installationclass to zero, which clears the badge number.Besides, you can also customize the sounds of push notifications for iOS devices.
Specifying contents when sending messages from a client
When using the first way introduced above, the content included in each push notification is the same regardless of the message being sent out. Is it possible to dynamically generate these contents to make them relevant to the actual messages?
Remember how we specified
LCIMMessageOptionwhen sending transient messages? The same parameter takes in apushDataproperty which allows you to specify the contents of push notifications. Here is a code example:
- Unity
- Android
- iOS
- JavaScript
LCIMTextMessage message = new LCIMTextMessage("Hey Jerry, me and Kate are gonna watch a game at a bar tonight. Wanna come with us?");
LCIMMessageSendOptions sendOptions = new LCIMMessageSendOptions {
    PushData = new Dictionary<string, object> {
        { "alert", "New message received"},
        { "category", "Message"},
        { "badge", 1},
        { "sound", "message.mp3"}, // The name of the file for the sound; has to be present in the app
        { "custom-key", "This is a custom attribute with custom-key being the name of the key. You can use your own names for keys."}
    }
};
LCIMTextMessage msg = new LCIMTextMessage();
msg.setText("Hey Jerry, me and Kate are gonna watch a game at a bar tonight. Wanna come with us?");

LCIMMessageOption messageOption = new LCIMMessageOption();
String pushMessage = "{\"alert\":\"New message received\", \"category\":\"Message\","
                    + "\"badge\":1,\"sound\":\"message.mp3\","
                    + "\"custom-key\":\"This is a custom attribute with custom-key being the name of the key. You can use your own names for keys.\"}";
messageOption.setPushData(pushMessage);
conv.sendMessage(msg, messageOption, new LCIMConversationCallback() {
    @Override
    public void done(LCIMException e) {
        if (e == null) {
            // Sent
        }
    }
});
LCIMMessageOption *option = [[LCIMMessageOption alloc] init];
option.pushData = @{@"alert" : @"New message received", @"sound" : @"message.mp3", @"badge" : @1, @"custom-key" : @"This is a custom attribute with custom-key being the name of the key. You can use your own names for keys."};
[conversation sendMessage:[LCIMTextMessage messageWithText:@"Hey Jerry, me and Kate are gonna watch a game at a bar tonight. Wanna come with us?" attributes:nil] option:option callback:^(BOOL succeeded, NSError * _Nullable error) {
    // Handle result and error
}];
const message = new TextMessage('Hey Jerry, me and Kate are gonna watch a game at a bar tonight. Wanna come with us?');
conversation.send(message), {
    pushData: {
        "alert": "New message received",
        "category": "Message",
        "badge": 1,
        "sound": "message.mp3", // The name of the file for the sound; has to be present in the app
        "custom-key": "This is a custom attribute with custom-key being the name of the key. You can use your own names for keys."
    }
});
Generating contents dynamically on the server side
The second way introduced above allows you to compose the contents of push notifications based on the messages being sent, but the logic needs to be predefined on the client side, which makes things less flexible.
So we offer a third way that allows you to define the logic of push notifications on the server side with the help of hooks. Check this page for more details.
Here is a comparison of the priorities of the three methods mentioned above: Generating contents dynamically on the server side > Specifying contents when sending messages from a client > Setting up a static message.
If more than one of these methods are implemented at the same time, the push notifications generated on the server side will always get the highest priority. Those sent from clients will get a lower priority, and the static message set up on the dashboard will get the lowest priority.
Implementations and Restrictions
If your app is using push notification services together with Instant Messaging, whenever a client logs in, the SDK will automatically associate the clientId with the device information (stored in the Installation table) by having the device subscribe to the channel with clientId as its name. The association can be found in the channels field of the _Installation table. By doing so, when the cloud wants to send a push notification to a client, the client's device can be targeted by the clientId associated with it.
Since Instant Messaging generates way more push notifications than other sources, the cloud will not keep any records of them, nor can you find them on Developer Center > Your game > Game Services > Cloud Services > Push Notification > Push records.
Each push notification is only valid for 7 days. This means that if a device doesn't connect to the cloud for more than 7 days, it will not receive this push notification anymore.
Other Settings for Push Notifications
By default, push notifications are sent to the production environment of APNs for iOS devices.
Use "_profile": "dev" if you want to switch to the development environment of APNs (the development certificate will be used if certificate-based authentication is selected):
{
  "alert": "New message received",
  "_profile": "dev"
}
When push notifications are sent via Token Authentication, if your app has private keys for multiple Team IDs, please confirm the one that should be used for your target devices and fill it into the _apns_team_id parameter, since Apple doesn't allow a single request to include push notifications sent to devices belonging to different Team IDs.
{
  "alert": "New message received",
  "_apns_team_id": "my_fancy_team_id"
}
The _profile and _apns_team_id attributes are used internally by the push service and neither will actually be used.
When specifying additional push messages, different push messages are supported for different kinds of devices (e.g. ios, android). Keep in mind that the internal attributes, _profile and _apns_team_id, should not be specified inside the ios object, otherwise they will not take effect.
As an example, a push message like this will cause the message to be pushed to APNs’ production environment:
{
  "ios": {
    "badge": "Increment",
    "category": "NEW_CHAT_MESSAGE",
    "sound": "default",
    "thread-id": "chat",
    "alert": {
      "title": "New message received",
      "body": "This message will still be pushed to the APNs production environment because of the incorrect location of the internal property _profile."
    },
    "_profile": "dev"
  },
  "android": {
    "title": "New message received",
    "alert": ""
  }
}
To push to the development environment:
{
  "_profile": "dev",
  "ios": {
    /* … */
  },
  "android": {
    /* … */
  }
}
You can insert certain built-in variables into the content you enter on Developer Center > Your game > Game Services > Cloud Services > Instant Messaging > Settings > Push notifications. By doing this, you can embed certain context into the content of push notifications:
${convId}The ID of the conversation${timestamp}The Unix timestamp when the push notification is triggered${fromClientId}TheclientIdof the sender
Message Synchronization
Push notification seems to be a good way to remind users of new messages, but the actual messages won't get delivered until the user goes online. If a user hasn't been online for an extremely long time, there will be tons of messages piled up on the cloud. How can we make sure that all these messages will be properly delivered once the user goes online?
Instant Messaging provides a way for clients to pull messages from the cloud. The cloud keeps track of the last message each user receives from each conversation. When a user goes online, the conversations containing new messages as well as the number of unread messages in each of them will be computed and the client will receive a notification indicating that there is an update on the total number of unread messages. The client can then proactively fetch these messages.
Notifications on Updates of Unread Message Count
When the client goes online, the cloud will compute the numbers of unread messages of all the conversations the client belongs to.
To receive such notifications, the client needs to indicate that it is using the method of pulling messages from the cloud. As mentioned earlier, the JavaScript, Android, and iOS SDKs use this method by default, so there isn't any configuration that needs to be done.
The SDK will maintain an unreadMessagesCount field on each IMConversation to track the number of unread messages in the conversation.
When the client goes online, the cloud will drop in a series of <Conversation, UnreadMessageCount, LastMessage> in the format of events indicating updates on the numbers of unread messages. Each of them matches a conversation containing new messages and serves as the initial value of a <Conversation, UnreadMessageCount> maintained on the client side. After this, whenever a message is received by the SDK, the corresponding unreadMessageCount will be automatically increased. When the number of unread messages of a conversation is cleared, both <Conversation, UnreadMessageCount> on the cloud and maintained by the SDK will be reset.
If the count of unread messages is enabled, it will keep increasing until you explicitly reset it. It will not be reset automatically if the client goes offline again. Even if a message is received when the client is online, the count will still increase. Make sure to reset the count by marking conversations as read whenever needed.
When the number of <Conversation, UnreadMessageCount> changes, the SDK will send an UNREAD_MESSAGES_COUNT_UPDATE event to the app through IMClient. You can listen to this event and make corresponding changes to the number of unread messages on the UI. We recommend you cache unread counts at the application level, and whenever there are two different counts available for the same conversation, replace the older data with the newer one.
- Unity
- Android
- iOS
- JavaScript
tom.OnUnreadMessagesCountUpdated = (convs) => {
    foreach (LCIMConversation conv in convs) {
        // conv.Unread is the number of unread messages in conversation
    }
};
// Implement the delegate method onUnreadMessagesCountUpdated of LCIMConversationEventHandler to receive notifications on updates of unread message count
onUnreadMessagesCountUpdated(LCIMClient client, LCIMConversation conversation) {
    // conversation.getUnreadMessagesCount() is the number of unread messages in conversation
}
// Use delegate method conversation:didUpdateForKey: to observe the unreadMessagesCount property of the conversation
- (void)conversation:(LCIMConversation *)conversation didUpdateForKey:(LCIMConversationUpdatedKey)key {
    if ([key isEqualToString:LCIMConversationUpdatedKeyUnreadMessagesCount]) {
        NSUInteger unreadMessagesCount = conversation.unreadMessagesCount;
        /* New messages exist; update UI or fetch messages */
    }
}
var { Event } = require("leancloud-realtime");
client.on(Event.UNREAD_MESSAGES_COUNT_UPDATE, function (conversations) {
  for (let conv of conversations) {
    console.log(conv.id, conv.name, conv.unreadMessagesCount);
  }
});
When responding to an UNREAD_MESSAGES_COUNT_UPDATE event, you get a Conversation object containing the lastMessage property which is the last message received by the current user from the conversation. To display the actual unread messages, fetch the messages that come after it.
The only way to clear the number of unread messages is to mark the messages as read with Conversation#read. You may do so when:
- The user opens a conversation
- The user is already in a conversation and a new message comes in
Implementation details on unread message counts for iOS and Android SDKs:
iOS SDKs (Objective-C and Swift) will fetch all UNREAD_MESSAGES_COUNT_UPDATE events provided by the cloud on login, while Android SDK only fetches the latest events generated after the previous fetch (Android SDK remembers the timestamp of the last fetch).
Therefore, Android developers need to cache the events for unread messages at the application level, because the events of some conversations have been fetched on previous logins, but not the current one. For iOS developers, they need to do the same thing because the cloud tracks at most 50 conversations containing unread messages, and the events for unread messages are only available for those conversations. If the events for unread messages are not cached, some conversations may have inaccurate counts of unread messages.
Multi-Device Sign-on and Single-Device Sign-on
In some scenarios, a user can stay logged in on multiple devices at the same time. In other ones, a user can be logged in on only one device at a time. With Instant Messaging, you can easily implement both multi-device sign-on and single-device sign-on depending on your needs.
When creating an IMClient instance, you can provide a tag parameter besides clientId to have the cloud check the uniqueness of <ClientId, Tag> when logging the user in. If the user is already logged in on another device with the same tag, the cloud will log the user out from that device, otherwise the user will stay logged in on all their devices. When a user is logged in on multiple devices, the messages coming to this user will be delivered to all these devices and the numbers of unread messages will be synchronized. If the user sends a message from one of these devices, the message will appear on other devices as well.
Based on the above mechanism, a variety of requirements can be met with Instant Messaging:
- Multi-Device Sign-on: If
tagis not specified when logging in, a user will be able to have any number of devices logged in at the same time. - Single-Device Sign-on: If all the clients share the same
tag, a user will be able to stay logged in on only one device at a time. - Multi-Device Sign-on With Restrictions: You can assign a unique
tagfor each type of device. For example, if you haveMobilefor phones,Padfor tablets, andWebfor desktop computers, a user will be able to stay logged in on three devices with different types, but not two desktop computers.
Setting Tags
The code below sets a tag called Mobile when creating IMClient, which can be used for the mobile client of your app:
- Unity
- Android
- iOS
- JavaScript
LCIMClient client = new LCIMClient(clientId, "Mobile", "your-device-id");
// Provide tag as the second parameter
LCIMClient currentClient = LCIMClient.getInstance(clientId, "Mobile");
currentClient.open(new LCIMClientCallback() {
  @Override
  public void done(LCIMClient avimClient, LCIMException e) {
    if(e == null){
      // Successfully logged in
    }
  }
});
NSError *error;
LCIMClient *currentClient = [[LCIMClient alloc] initWithClientId:@"Tom" tag:@"Mobile" error:&error];
if (!error) {
   [currentClient openWithCallback:^(BOOL succeeded, NSError *error) {
       if (succeeded) {
           // Successfully logged in
       }
   }];
}
realtime.createIMClient("Tom", { tag: "Mobile" }).then(function (tom) {
  console.log("Tom logged in.");
});
With the code above, if a user logs in on one mobile device and then logs in on another one (with the same tag), the user will be logged out from the former one.
Handling Conflicts
When the cloud encounters the same <ClientId, Tag> for a second time, the device used for the earlier one will be logged out and receive a CONFLICT event:
- Unity
- Android
- iOS
- JavaScript
tom.OnClose = (code, detail) => {

};
public class AVImClientManager extends LCIMClientEventHandler {
  /**
   * Implementing this method to handle the event of being logged out
   *
   *
   * @param client
   * @param code The status code indicating the reason of being logged out
   */
  @Override
  public void onClientOffline(LCIMClient avimClient, int i) {
    if(i == 4111){
      // Tell the user that the same clientId is logged in on another device
    }
  }
}

// Need to register the custom LCIMClientEventHandler to receive onClientOffline notifications
LCIMClient.setClientEventHandler(new AVImClientManager());
- (void)imClientClosed:(LCIMClient *)imClient error:(NSError * _Nullable)error
{
    if ([error.domain isEqualToString:kLeanCloudErrorDomain] &&
        error.code == 4111) {
        // Tell the user that the same clientId is logged in on another device
    }
}
var { Event } = require("leancloud-realtime");
tom.on(Event.CONFLICT, function () {
  // Tell the user that the same clientId is logged in on another device
});
The reason a device gets logged out will be included in the event so that you can display a message to the user with that.
All the "logins" mentioned above refer to users' explicit logins. If the user has already logged in, when the application restarts or reconnects, the SDK will relogin automatically. Under these scenarios, if a login conflict is encountered, the cloud will not log out earlier devices. The device trying to relogin will receive an error instead.
Similarly, if you want an explicit login to receive an error when encountering a conflict, you can pass a special parameter on login:
- Unity
- Android
- iOS
- JavaScript
await tom.Open(false);
LCIMClientOpenOption openOption = new LCIMClientOpenOption();
openOption.setReconnect(true);
LCIMClient currentClient = LCIMClient.getInstance(clientId, "Mobile");
currentClient.open(openOption, new LCIMClientCallback() {
  @Override
  public void done(LCIMClient avimClient, LCIMException e) {
    if(e == null){
      // Connected
    }
  }
});
NSError *err;
LCIMClient *currentClient = [[LCIMClient alloc] initWithClientId:@"Tom" tag:@"Mobile" error:&err];
if (err) {
    NSLog(@"init failed with error: %@", err);
} else {
    [currentClient openWithOption:LCIMClientOpenOptionReopen callback:^(BOOL succeeded, NSError * _Nullable error) {
        if ([error.domain isEqualToString:kLeanCloudErrorDomain] &&
            error.code == 4111) {
            // Failed to log in; the previously logged in device will not be logged out
        }
    }];
}
realtime
  .createIMClient("Tom", { tag: "Mobile", isReconnect: true })
  .then(function (tom) {
    console.log(
      "Failed to log in; the previously logged in device will not be logged out"
    );
  });
Custom Message Types
Although Instant Messaging already supports a number of common message types by default, you can still define your own types as you need. For example, if you want your users to send messages containing payments and contacts, you can implement that with custom message types.
Custom Message Attributes
The following message types are offered by default:
TextMessageText messageImageMessageImage messageAudioMessageAudio messageVideoMessageVideo messageFileMessageFile message (.txt, .doc, .md, etc.)LocationMessageLocation message
When composing messages with these types, you can include additional information by attaching custom attributes in the format of key-value pairs. For example, if you are sending a message and need to include city information, you can put it into attributes of the message rather than create your own message type.
- Unity
- Android
- iOS
- JavaScript
LCIMTextMessage messageWithCity = new LCIMTextMessage("It is getting cold.");
messageWithCity["city"] = "Montreal";
LCIMTextMessage messageWithCity = new LCIMTextMessage();
messageWithCity.setText("It is getting cold.");
HashMap<String,Object> attr = new HashMap<String,Object>();
attr.put("city", "Montreal");
messageWithCity.setAttrs(attr);
NSDictionary *attributes = @{ @"city": @"Montreal" };
LCIMTextMessage *messageWithCity = [LCIMTextMessage messageWithText:@"It is getting cold." attributes:attributes];
var messageWithCity = new TextMessage("It is getting cold.");
messageWithCity.setAttributes({ city: "Montreal" });
Creating Your Own Message Types
If the built-in types cannot fulfill your requirements at all, you can implement your custom message types.
- Unity
- Android
- iOS
- JavaScript
By inheriting from LCIMTypedMessage, you can define your own types of messages. The basic steps include:
- Define a subclass inherited from
LCIMTypedMessage. - Register the subclass when initializing.
class EmojiMessage : LCIMTypedMessage {
    public const int EmojiMessageType = 1;

    public override int MessageType => EmojiMessageType;

    public string Ecode {
        get {
            return data["ecode"] as string;
        } set {
            data["ecode"] = value;
        }
    }
}

// Register subclass
LCIMTypedMessage.Register(EmojiMessage.EmojiMessageType, () => new EmojiMessage());
By inheriting from LCIMTypedMessage, you can define your own types of messages. The basic steps include:
- Implement the new message type inherited from
LCIMTypedMessage. Make sure to:- Add the
@LCIMMessageType(type=123)annotation to the class
The value assigned to the type (123here) can be defined yourself. Negative numbers are for types offered by default and positive numbers are for those defined by you. - Add the
@LCIMMessageField(name="")annotation when declaring custom fieldsnameis optional. Custom fields need to have their getters and setters. - Include an empty constructor (see the sample below), otherwise there will be an error with type conversion.
- Add the
- Call
LCIMMessageManager.registerLCIMMessageType()to register the class. - Call
LCIMMessageManager.registerMessageHandler()to register the handler for messages.
@LCIMMessageType(type = 123)
public class CustomMessage extends LCIMTypedMessage {
  // An empty constructor has to be present
  public CustomMessage() {

  }

  @LCIMMessageField(name = "_lctext")
  String text;
  @LCIMMessageField(name = "_lcattrs")
  Map<String, Object> attrs;

  public String getText() {
    return this.text;
  }

  public void setText(String text) {
    this.text = text;
  }

  public Map<String, Object> getAttrs() {
    return this.attrs;
  }

  public void setAttrs(Map<String, Object> attr) {
    this.attrs = attr;
  }
}

// Register
LCIMMessageManager.registerLCIMMessageType(CustomMessage.class);
By inheriting from LCIMTypedMessage, you can define your own types of messages. The basic steps include:
- Implement the
LCIMTypedMessageSubclassingprotocol; - Register the subclass. This is often done by calling
[YourClass registerSubclass]in the+loadmethod of the subclass or-application:didFinishLaunchingWithOptions:inUIApplication.
// Definition

@interface CustomMessage : LCIMTypedMessage <LCIMTypedMessageSubclassing>

+ (LCIMMessageMediaType)classMediaType;

@end

@implementation CustomMessage

+ (LCIMMessageMediaType)classMediaType {
    return 123;
}

@end

// Register subclass
- (BOOL)application:(UIApplication *)application didFinishLaunchingWithOptions:(NSDictionary *)launchOptions {
    [CustomMessage registerSubclass];
}
By inheriting from TypedMessage, you can define your own types of messages. The basic steps include:
- Declare the new message type by inheriting from
TypedMessageor its subclass and then:- Apply the
messageType(123)decorator to the class. The value assigned to the type (123here) can be defined yourself (negative numbers are for types offered by default and positive numbers are for those defined by you). - Apply the
messageField(['fieldName'])decorator to the class to declare the fields that should be sent.
- Apply the
- Call
Realtime#register()to register the type.
For example, to implement the OperationMessage introduced in Transient Messages:
// TypedMessage, messageType, and messageField are provided by leancloud-realtime
// Use `var { TypedMessage, messageType, messageField } = AV;` in browser
var { TypedMessage, messageType, messageField } = require("leancloud-realtime");
// Define OperationMessage for sending and receiving messages regarding user operations
export class OperationMessage extends TypedMessage {}
// Specify the type; can be other positive integers
messageType(1)(OperationMessage);
// The `op` field needs to be sent with the message
messageField("op")(OperationMessage);
// Register the class, otherwise an incoming OperationMessage cannot be automatically resolved
realtime.register(OperationMessage);
See Back to Receiving Messages in the previous chapter for more details on how to receive messages with custom types.